Make
Any Alien trilogy, part 4:
Hair, Painting, and Absurdly
Alien Projects
Well, in the last three parts of our trilogy we've learned:
- Latex is our friend (unless allergic),
- Getting plastered is a good start,
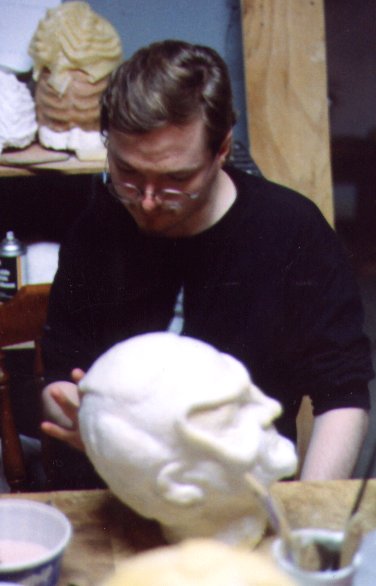
- Clay can give our imaginations form,
- Even complex pieces like a Grand Nagus can be patched
together
with a drop of that rubbery goo.
But is our trilogy finished? No! We're still stuck
with a colorless,
hairless, over-sized condom until we add the final bells and whistles.
 Painting
Color
Painting
Color
Okay, I touched onto this a bit in
Part 2.
Some of those
points from three issues back are more true than ever before!
Specifically, you need to be sure the paint is compatible with the
latex, and one of the best ways is to mix latex directly into the color
of acrylic paint you've mixed for the task. An even
one-to-one mix of
latex to acrylic should do, or even anything close. You'll
find that some fabric paints have done some of this for you.
Why is
this truer
now than before? Even the construction industry has made
Latex Acrylic
to be the standard for outdoor house paints.
If you're doing an extraordinary professional negative cast, you might
have the skill and patience to paint from the outside inward, starting
from the light highlights to the darker tones.
But
that's crazy.
The standard approach for either negative or positive molds is to
finish the mask first, then paint darker shades underneath, building
out to lighter highlights. This gives theatrical emphasis to
the
darker creases and crevices.
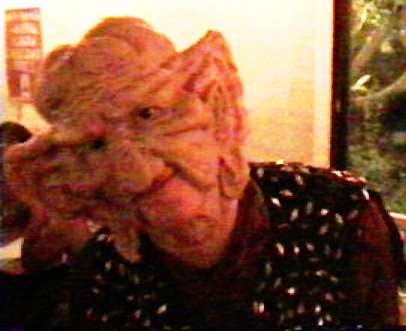
 Hair
Hair
Eyebrows and hair are needed next, unless you plan to build an Army of
Changs. Hmm, wouldn't that be cool? No, give me
hair. After all,
most of the appeal of looking Klingon is similar to dressing in
drag:
The wigs, the makeup, and those tall leather boots...
We buy packs of hair from a Chinese import shop that carries a lot of
hair and beauty products. They sell full wigs, but you get
greater
control of coverage and body thickness when you buy packs.
The first step is to lay out some sheet plastic, either by the roll or
by using big plastic garbage bags. Lay those flat on a big
table.
Next, we'll apply latex. We got ketchup/mustard squirt
bottles from a
dollar store, and we fill them with black painted molding
latex. Since
you've already colored the headpiece, dark roots are more becoming than
bright patches of flesh. We often color the back of the
headpiece
itself with black behind the hairline.
The next step is to measure out the hair onto the plastic.
Better to
leave the lengths too long and trim later than to be found too
short.
Once the hair is sliding flat onto the plastic, you can then squirt/dab
the latex across the hair into a ribbon 2cm wide...
*Or*
to kill two birds with one stone, you can make that 4cm wide and we'll
cut it in half once it's dry, able to use each side. It takes
a couple
hours to dry thoroughly, perhaps more depending on the hair and the
thickness of the molding latex. A hair dryer on light heat
can speed
things up.
Drops of latex will glue the latex ribbons of hair to the latex
headpiece. start from the lower back of the head, shingling
your way
up. Your
last layer at the top will need
to point opposite,
over the face, so it can be flipped up and back, hiding the
hairline.
You will glue it (with latex) against the hairline, hanging over the
face. When it dries, you then flip it back over the rest of
the hair.
Eyebrows
Eyebrows can be done a couple ways. The simplest way I've
seen Qob of
the Rakehell do it is to buy prefab mustaches, then cut them to be
applied upside down. Brilliantly easy.
But where is the suffering for artistry in
that?!?
That's for
simpletons who don't want to use a toothpick to paint their
murals.
For me, I glue them on a tuft at a time. If it's a temporary
piece,
for a limited number of performances, I use latex. But for
the durable
heads, I use superglue, which is murder on my fingertips.
Always start adding tufts from the back-outside, shingling them inward
as you work your way toward the nose. I like the "Batman
eyebrows,"
which start kinda high, and angle steeply down until they curl under
the brow. You can even trim them for a neat "Tom Cruise"
look, but
don't get over-zealous with the tiny scissors, or it'll look like
nettle fuzz or felt.
No more latex... Let's get CRAZY!
My prouder creations didn't use latex at all. Sure, I could
mix tricks
with my latex masks... it would be fun to do Andorians with articulated
antennae. But here's a couple of really alien aliens I've
done:
JAWA EYES: I took two superbright LEDs, a nine-volt
battery, and
a couple 5-volt regulators. The silky black face mask is a
common
halloween purchase. We actually rigged the wiring onto safety
goggles
the first model, and on the second model used slimmer safety glasses
(behind the black fabric). The lights are actually about
where your
cheeks are, so they won't be hidden by the hood.
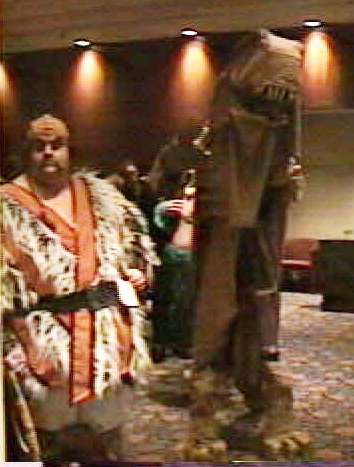
 THE
VORLON ENCOUNTER SUIT:
THE
VORLON ENCOUNTER SUIT: I bent up a
child sized hula hoop,
and stretched pillow foam and vinyl over them, stapled to the
underside. Then you staple on a drapery.... that's one fast
Vorlon!
The same vinyl covered a cardboard box I reshaped for the
head.
NOTE:
My first one left an open hole for an eye. But who needs to
breath and
see?!? My second one did much better: The hole was covered
with an old
camera lens and has a superbright LED beaming through it. To
see, I
used a smaller lens, a door security lens, so one eye could watch as
objects are much closer than they appear. For breathing, I
noticed
there are "gill slits" behind the sides of the forward face plate.
 THE TYRANOSAURUS REX:
I cut a plastic lawn
chair up, using the
cut back as the forward gum line, and bending the arms over top to make
eye sockets.
Then I got clever.
I ran bicycle brake cables from my left hand to the eyes and eye
lids.
One pair of cables opened and closed the lids. The other pair
moved
the eyeballs left and right. The 18 inch stilts (built from
2x4s) were
made to look like backward-bending drumsticks, but the secret was that
the
long back toe acted like high heels. The spine was a
landscaping
drainage tube. The whole thing was beautifully balanced so I
could
tromp down hallways bent over, or stand 11 feet tall. But my
greatest
disappointment was that I never gave it a real skin.
Note: A more common approach to articulated masks
used by the
pros is Remote Control (RC) radio. I think the Enterprise
Andorians
and the Live-Action version of The TICK used these. Given
that RC
micro-cars dropped from $40 to $10 a few years ago, this approach could
be done rather cheap these days.
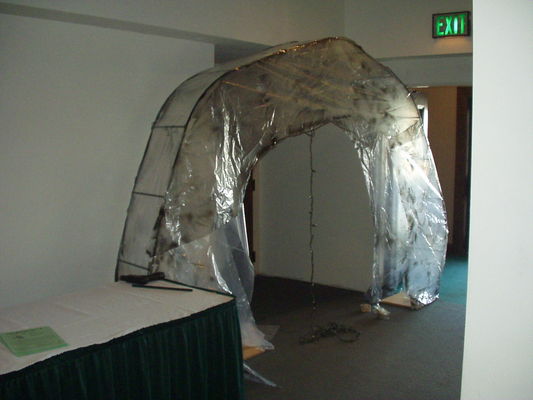 GUARDIAN
ON THE EDGE OF FOREVER:
GUARDIAN
ON THE EDGE OF FOREVER: Now I'm
edging out of costumes
if I'm not careful. This was framed with metal
rose
arbor
parts. I just changed the order so that the bent pieces and
straight
pieces formed funkier angles. It then put a skin of clear
plastic over
it, with a faint grey stone spray to hide things inside.
Inside, I
strung christmas lights. They're incandescent, so they
plugged easily
into my voice activation box. Then it could
light-as-you-speak. Great
fun... must have felt like Charlton Heston playing the voice of God in
the Ten Commandments.
SUMMARY:
The moral of the story is that unconventional costumes can use
conventional junk in unconventional ways. Think big, and you
can make
big memories with big impact.
- KwISt